
Part 3 Automatic CE User creation, removing/assigning Dynamics License Process from Power Virtual Agent embedded in PowerApps Portal using Power Automate and Microsoft Graph API

# Part 3 – Power Virtual Agent Configuration

1.      Create a simple bot in Power Virtual agent using the approach provided here.
2.      Create a new topic with triggers as per the approach provided here.
3.      For the demo purpose, I have used the following Lesson and topic as shown below:

4.      For the demo purpose as mentioned in #Part 2, I have used a very simple and linear approach of embedding Power Virtual Agent bot in PowerApps portal and perform the verification based on email address and verification code [basic approach].
-        To learn more about the authentication methods please watch this video.
5.      Click on Go to authoring Canvas, as shown in the image of Step 3 to start the triggers and conversation.
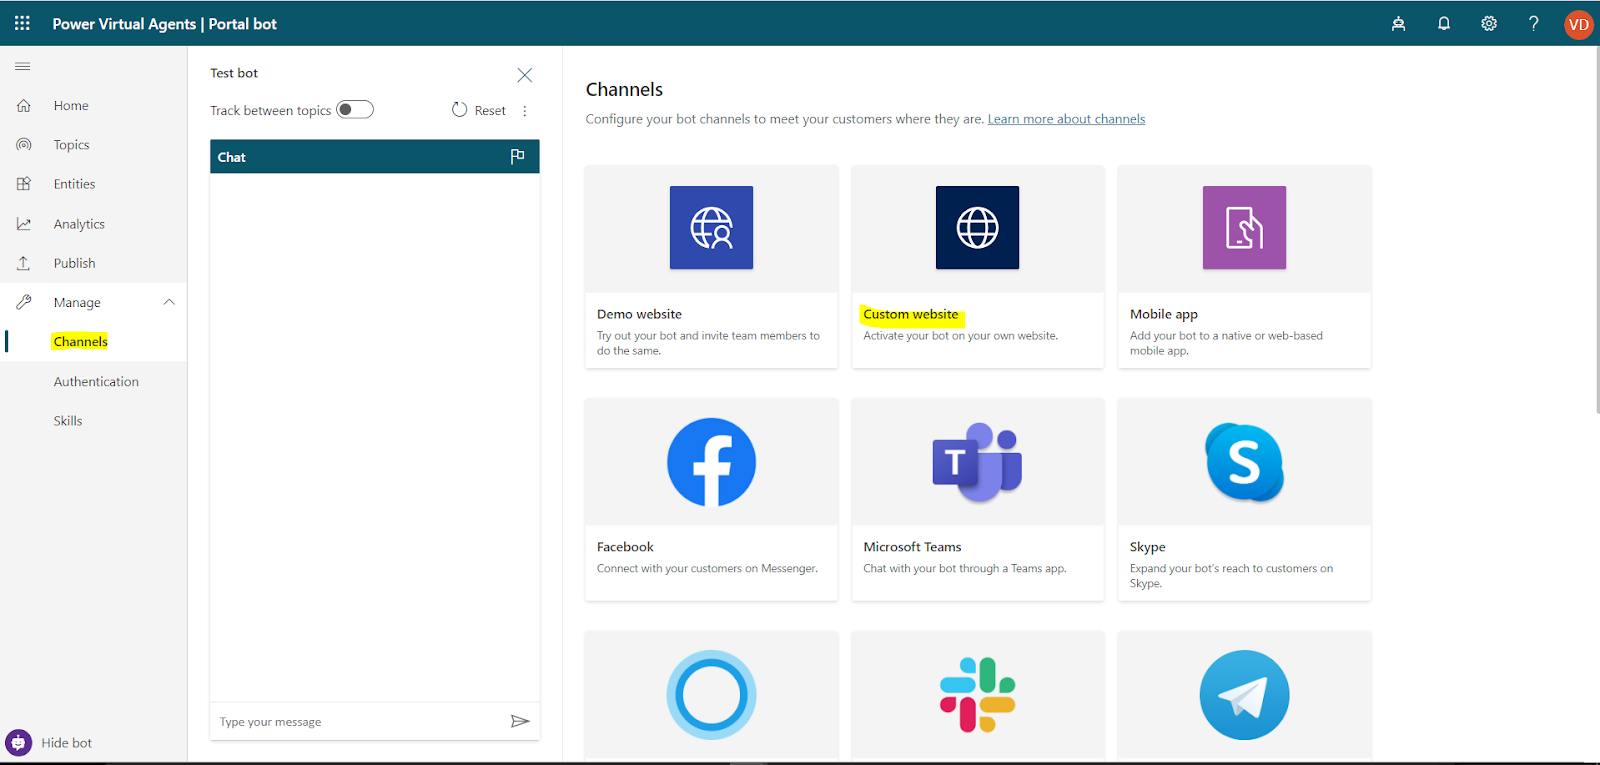
6.      Publish Portal Bot, as shown below:

7.      Embed the Portal Bot in PowerApps Portal as shown below:


8.      Create a new web page in CRM and embed it in the Copy (HTML), as shown below:

9.      The scenario that I will be covering here involves,
-        Customer/Client logs into Portal (I will be referring them as Port Bot Customer).
-        Starts a conversation with the Virtual Agent bot (I will be referring it as Portal Bot)
-        Portal Bot will give service request options based on the Categories already defined in Account entity of CE i.e.
o   Electrical
o   Plumbing
o   Cleaning
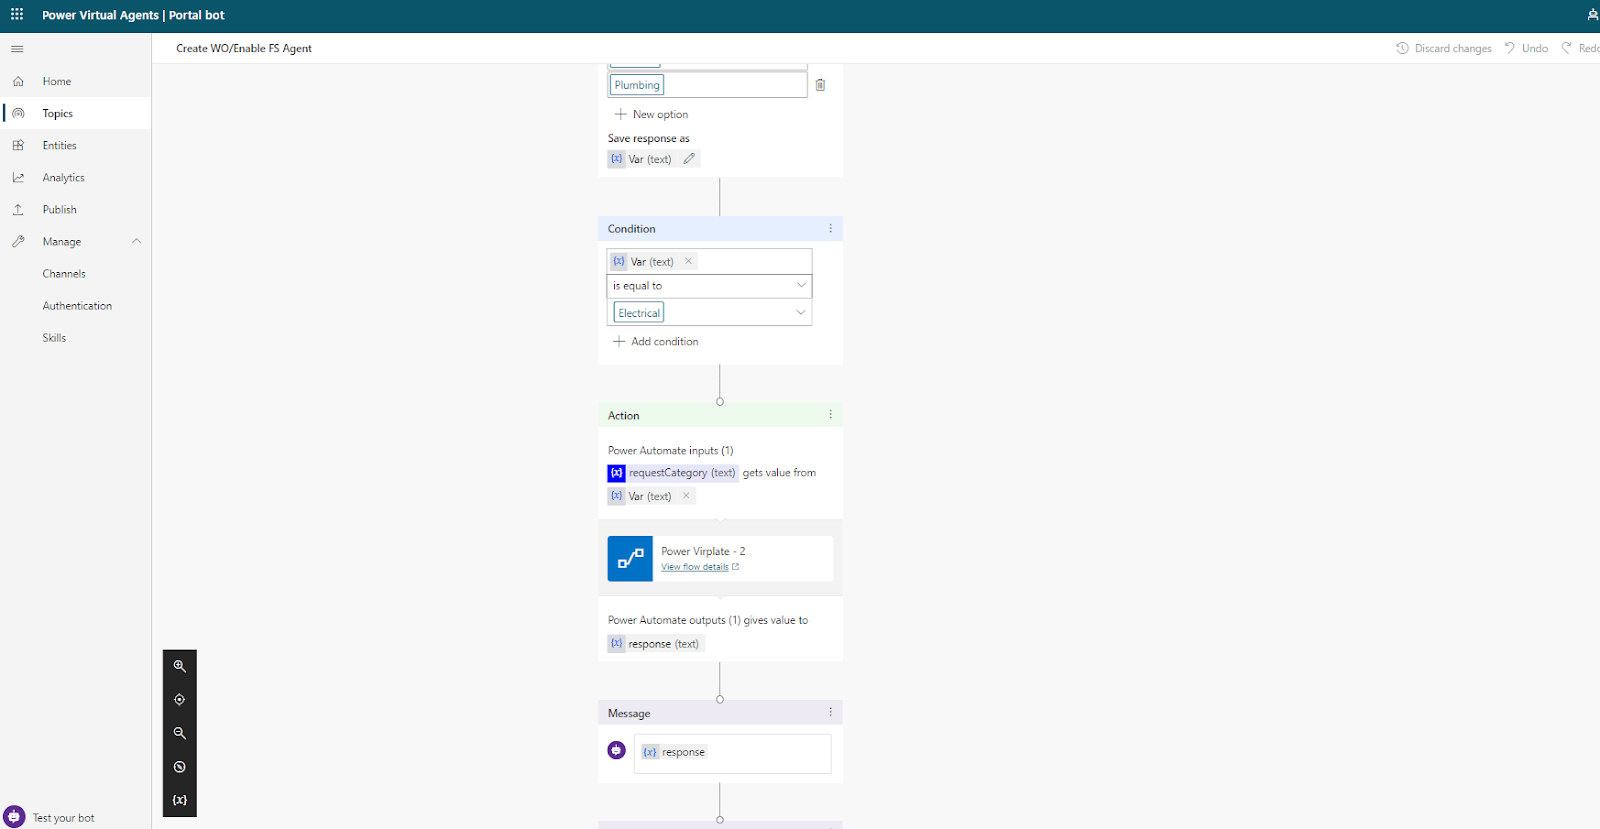
-        Our approach is linear and simple which is currently working only for Electrical request.
-        Once the request is raised by the Portal Bot Customer, a flow will be triggered that will check the account with Category “Electrical” exists and have capacity to take the work or not.
-        Portal Bot will ask for Portal Bot Customer’s email address to send a code in email.
-        Once the email is sent, Portal Bot will ask for the verification code.
-        Portal Bot Customer will enter the code received in the email.
-        Portal Bot will verify the code is correct or not.
-        Once the code is verified, it will create a WO and set the Reported By Contact on WO as the Portal Bot Customer.
-        Portal Bot will provide the WO number to Portal Bot Customer.
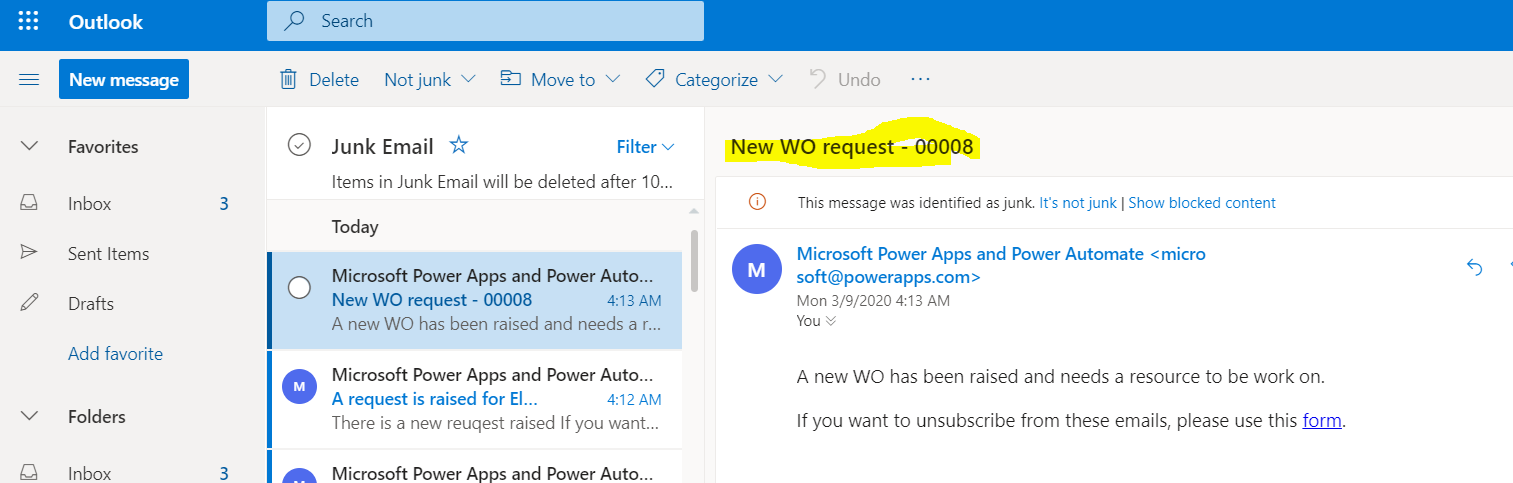
-        Portal Bot will send email to the Primary Contact of the Service Account on the WO.

The screenshot of the Portal, Verification Code Received and WO created in CRM is Shown below:

Portal Communications


Email Verification Code


Work Order Created in CRM


Email Sent to Primary Contact of Service Account


Configurations for the Portal Bot in Power Virtual Agent:


Configurations of Power Automate

I have used the following to automate the process.

Send Verification Code


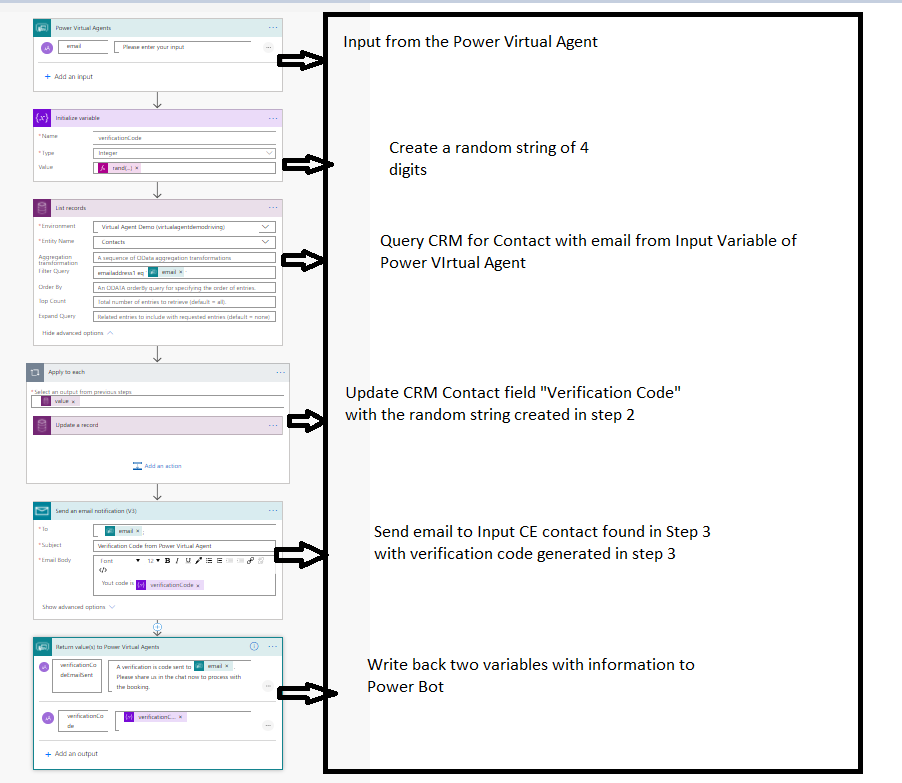
Verify Code Using Power Automate


Create Work Order


Send Email to Primary Contact of Service Account


Comments

Popular posts from this blog

Select Multiple Records from Entity List

Select Multiple Records from Entity List and Perform CRUD on records or related records Here I am going to demonstrate the process that can be used to select multiple records in an entity list to perform CRUD on records or related records. In this, we have one entity list which displays all the courses that are open for enrolment. CRM Contacts can log in to the portal and enrol for the desired coursed. The entity list is rendered on the portals as follows: The submit button is custom submit button which is designed to call Web API in order to perform the CRUD operation. Checkbox against each entity list item is designed using JQuery Registration Status is the Response from Web API Open means that the Registration is Currently Open for the logged-in portal contact to enrol and they can select multiple checkboxes and then click on Submit button to create their registration, In this, I am going to select : 1.  Diploma in Web Development 2.Bachelor of Applied Inf

Editable Entity List or Editable Subgrid PowerApps Portals

Editable Grid PowerApps Portal In this blog, I am going to explain how we can use PowerAutomate and old school JQuery on PowerApps portal to convert Entity List into editable entity list or subgrid. I am only using the string attributes of the Lead entity for Quick Update in this blog. The benefit of making entity list editable with this approach is that we do not loose the OOTB functionality of Search, Sorting, Grid Configuration to enable edit/view-details/delete and Filtering. How I manipulate the data attributes in entity list using JQuery is shown in the below screenshot The screenshot below shows how the code manipulates the entity list html elements using the above code. The PowerAutomate for updating the data in CRM. A success message is displayed on the portal to let user know that the update has been accomplished and the record is Updated in CRM The value retrieval on Click of custom Quick Update bu

PowerApps Portal Generic Error Feedback from Portal User

As we all know that whenever there is a server error on the PowerApps Portals we only see a generic error message. Which looks like There is a method of logging errors from the portal using Azure blob Storage, but this is something that I won’t be discussing today. I will be going ahead and asking for more information for the error on the portal from the Portal User actually experiencing it. Let’s see how we can achieve this thing. We can create Portal Generic Error in Content snippet to add custom text or information for the error message, but it is hard to get entity forms added using Content Snippet or any other HTML to be created using any bootstrap or custom css on this page. The only CSS that you get on this page is from the index page which highlights the h1 tag with bold and red color and everything that you add goes into the div with class dialog. I have made use of JavaScript to change HTML content and have added an entity form asking Portal User to submi