Generate ID Card with QR Code and Display Profile Photo on PowerApps Portal
In continuation of Part 4, let us say that the On-boarding process is not just restricted to create bookable resources but is also for newly hired employees. In this blog, I have decided to introduce a digital way to complete the on-boarding process of the new hires by issuing an ID Card with the QR Code. Considering the current pandemic situation of COVID-19, we are facing hindrances in the on-boarding process of the new hires who are now required to work from home, and, in order to tackle the same, digital ID cards would be issued that'd bear the QR codes.
The scenario will be covering the four-step and two-way process between Account Admin and New Emp: -
Step 1: During the on-boarding process, the Primary Contact of Account, I will be referring as Account Admin, will be creating some tasks on the Portal or in CE for the newly hired employee, I will be referring as New Emp, to upload there Photo and a Photo ID Card.
Step 2: New Emp logs into the portal and Uploads Photo ID and Provides Photo ID Proof, the Status changes from Awaiting Upload to Awaiting Approval and sends the email to Account Admin.
Step 3: Account Admin receives the email verifies the Photo and the Photo ID Proof and Approves it in the email. [I am only using one Task only which asks for Photo only.]
Step 4: Once the Approve is done, a PDF Photo ID Card is generated and sent in Email to the New Employee.
Addition Functionalities:
- Image uploaded in Task Type “Employee ID Card Photo” will be added as Entity Image field of Contact.
- The same image will be displayed as portal profile picture.
New Emp is added to CRM with the following details

Task Created for New Emp by Account Admin


I am not using any automated process until now.
Now the New Emp logs into the portal and looks at the list of Tasks:

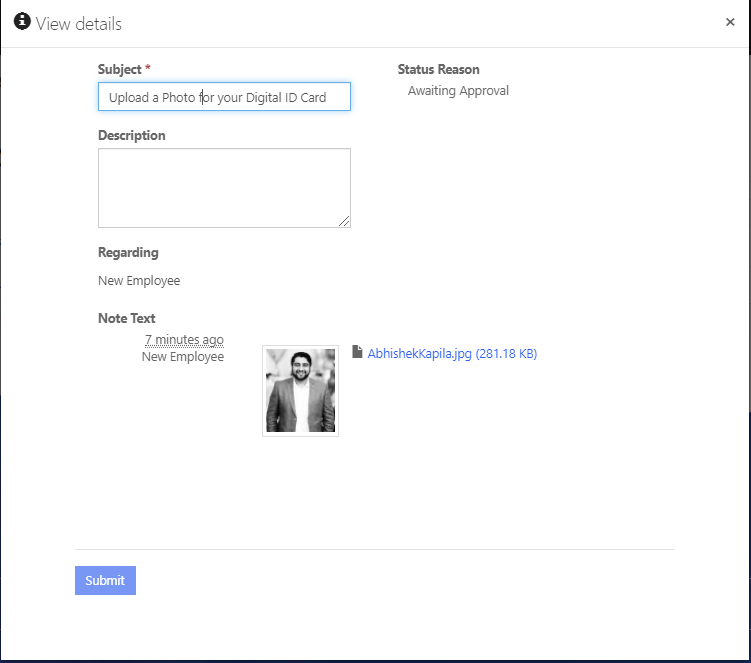
New Empl Uploads the Image and Submit the form, the task status changes to Awaiting Approval
Before Submitting Entity form Image

After Submitting Entity Form Image, did some JQuery for disabling and hiding things
Email sent out to Account Admin for Approval:

Account Admin Clicks on Approve

ID Card is generated and sent in email to the New Emp


Profile Pic on Portal

Profile Pic in CRM

Now let’s see how the process was executed,
Prerequisite
- Prepare a Word Document for ID Card Template:
- Enable developer option in MS Word
- Adjust the Size of document
- Get any ID Card Sample Online and edit it as per your expectations
- Create XML mappings for text and image that needs replacement

I am not good at designing, but this is what I have designed. Save this somewhere in One Drive or SharePoint as a template. I have used One Drive for this blog.
Step 1: As per this blog, the Task for Photo Upload has been done manually.
Step 2: New Emp uploads the photo via portal task and the Status Reason changes from Awaiting Upload to Awaiting Approval which triggers the flow explained below:

Email sent for approval.

Step 3: Account Admin reviews the email and clicks on Approve button which opens up a link on the portal as per this blog:
where uniqueKey is the ID of the content snippet record created in CRM with the name and value equal to refid in the above Url which is actually, the contact id of the New Emp and this is what will be set in QR code of the ID Card.
Below is the code for calling the flow, the code is embedded on the HTML Content webpage:
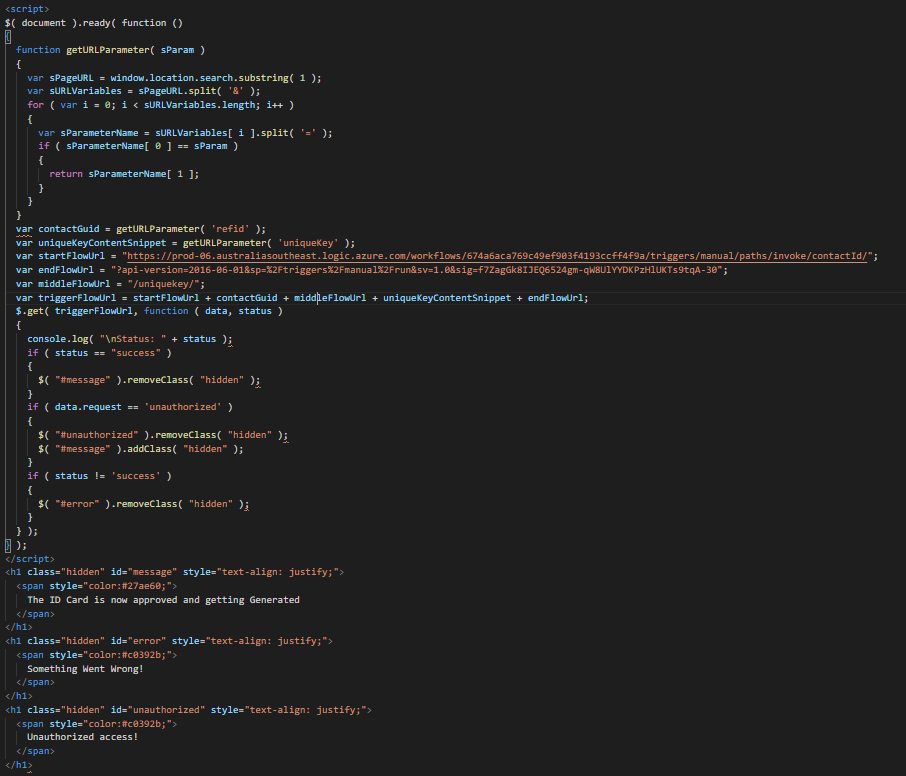
Let’s see how the flow is configured to respond to call from the above code:

Configuration of HttpRequest


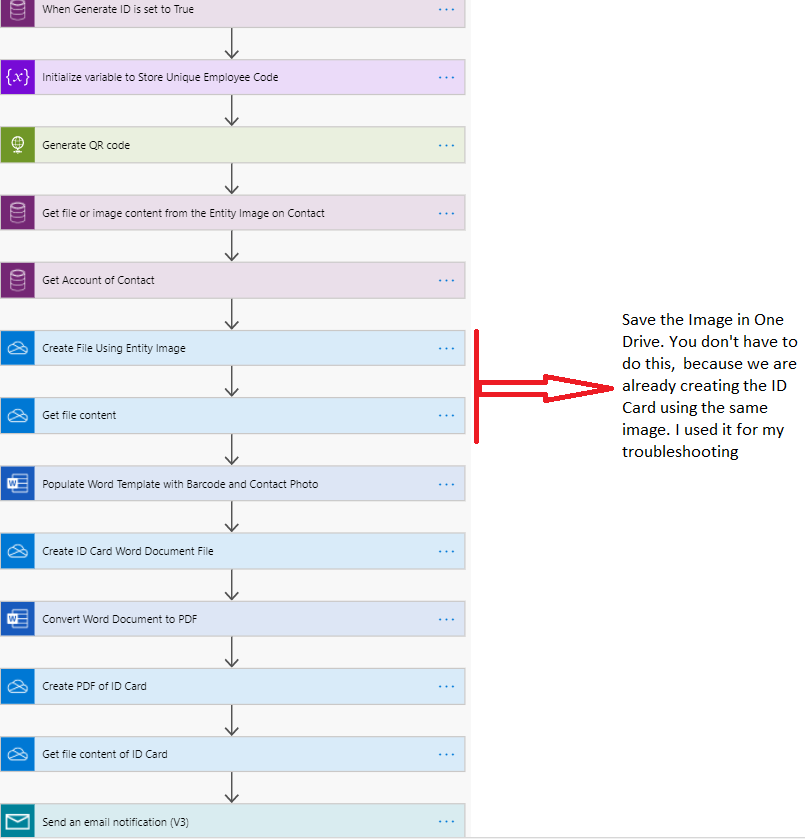
Step 4: The Power Automate to Generate ID card with QR code is explained below
Generate ID Card full
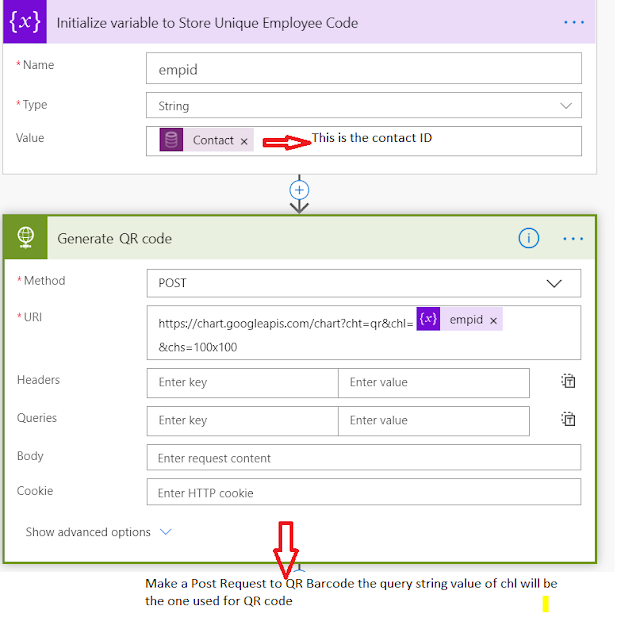
This is how we Generate QR Code
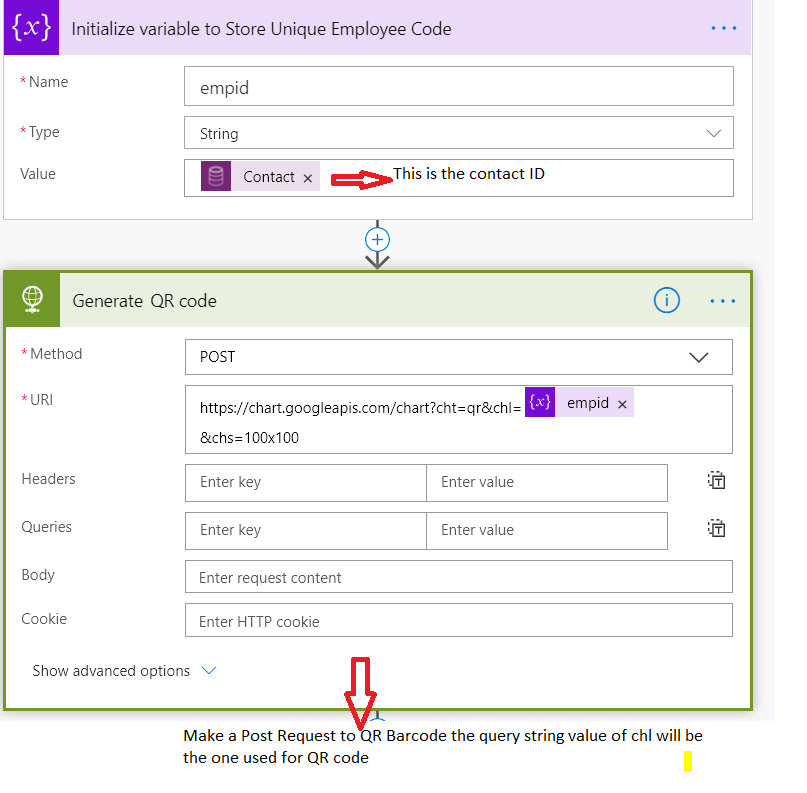
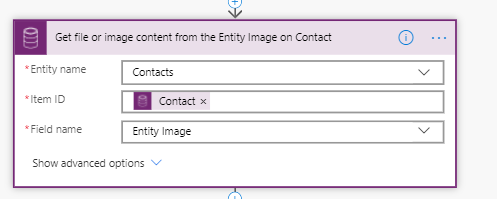
This is how we get EntityImage of Contact

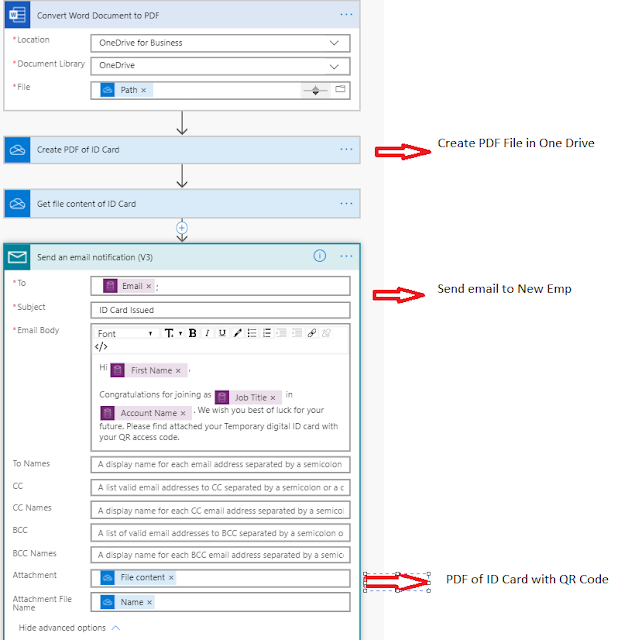
Fill in the document template and convert to PDF


Send Email to New Emp

For the Additional Feature of Portal, New Emp logs into the portal and views their profile pic uploaded for the image the code used is below:


Comments
Post a Comment