Part 4 Automatic CE User creation, removing/assigning Dynamics License Process from Power Virtual Agent embedded in PowerApps Portal using Power Automate and Microsoft Graph API
# Part 4 – PowerApps Portals Customizations for applying/removing the license of a CE Resource
- In Part 1, we learned how to set up Azure to use Power Automate with Microsoft Graph API for adding/removing licensing
- In Part 3, we learned how to automate a process of creating Work Order from a request is done by a Portal Bot Customer (a simple contact in CRM) from Power Virtual Agent embedded in Custom Portal and notification sent to the Primary contact of the Service Account of the WO created.
Continuing the process, we will now demonstrate the work that will be done by the Primary Contact of Service Account. I will be referring the Primary Contact here as the Resource Master and they will have access to Partner Portal.
Resource Master logs in Portal after receiving email from the Power Virtual Agent in Part 3 look for the resources as per the screenshot below:
EntityList Screenshot

The above screenshot is a simple entity list created with the view of Active Partner Contacts OOB with a filtered attribute using Company Name i.e. Primary Account.
Resource Master can search for a resource based on Current Status of On-boarding and Category as mentioned in Part 2
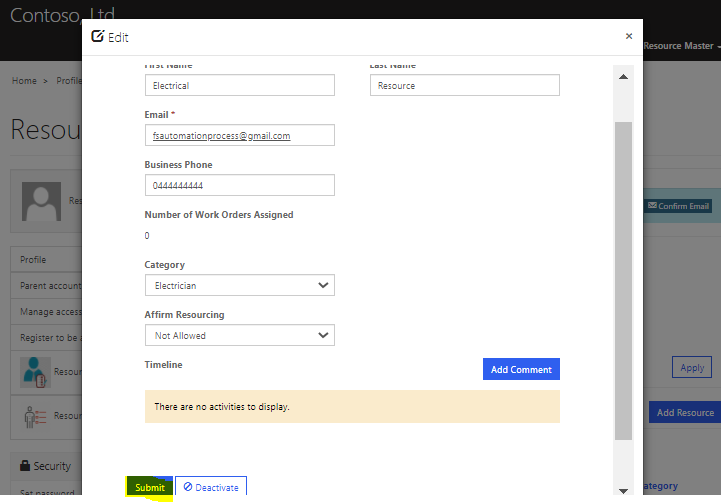
Let’s say Resource Master have a resource (a contact in CRM) with a category of Electrical and, Resource Master would like to enable it as a bookable resource in Field Service and assign Field Service/CE license. For our demo, we will be using CE license. Assuming, Resource Master have previously added a resource (Contact in CE), we call it as Electrical Resource with a proper verified email address. Assuming all necessary skills or characteristics have been associated to the contact already. I am not going in details for all of these setups, and will basically show how to add a CE Contact as a User in CRM using PowerAutomate and Microsoft Graph API
As per the screenshot below, I have filtered my resources with Category= Electrical. I have two options either to use Onboard9 Example9 for WO created in Part 3 or create a new resource.

We will go with creating a new resource, as per the screenshot below:

The Contact in CRM is created as:

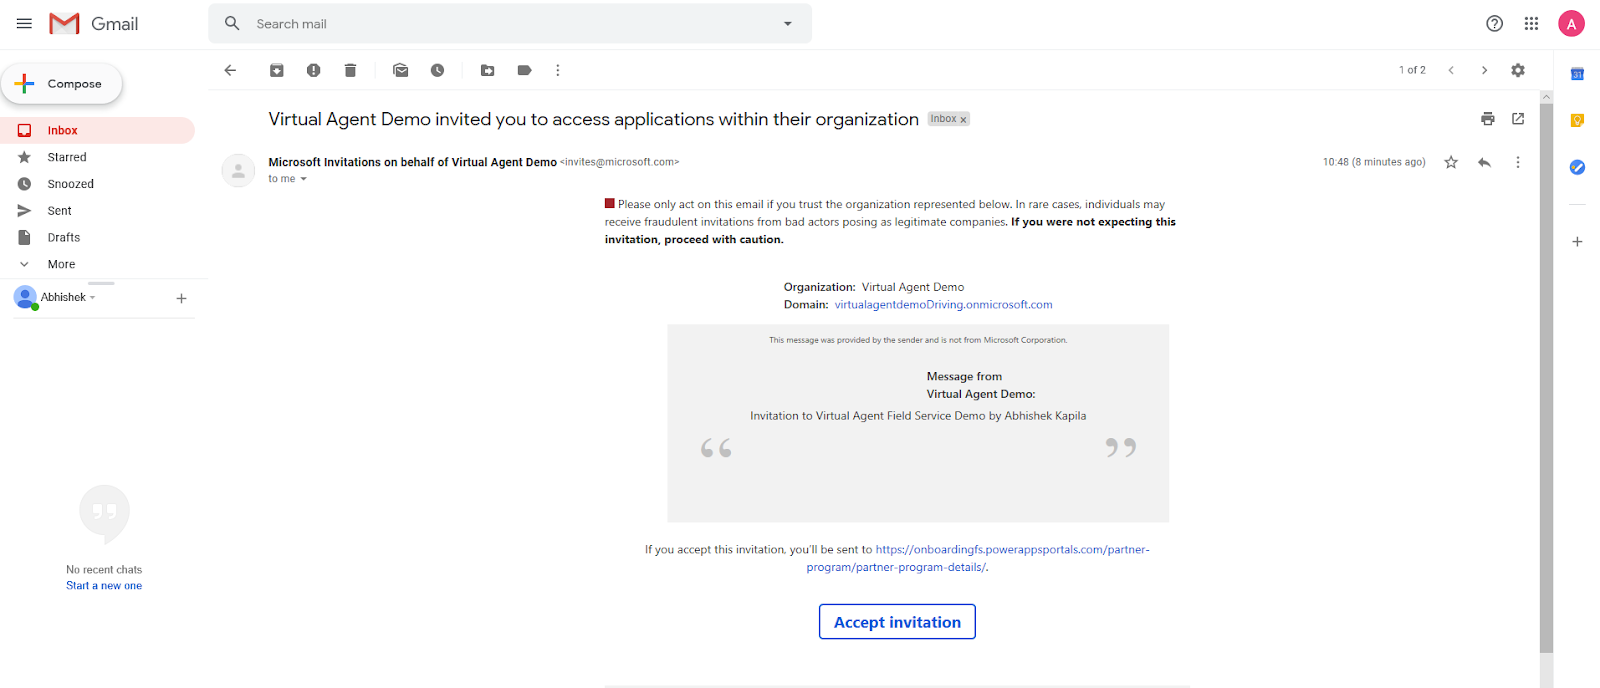
The Email received by the user as:
The user created in Azure AD is and added to group created in Part 1


User is associated to the contact and licenses are added.

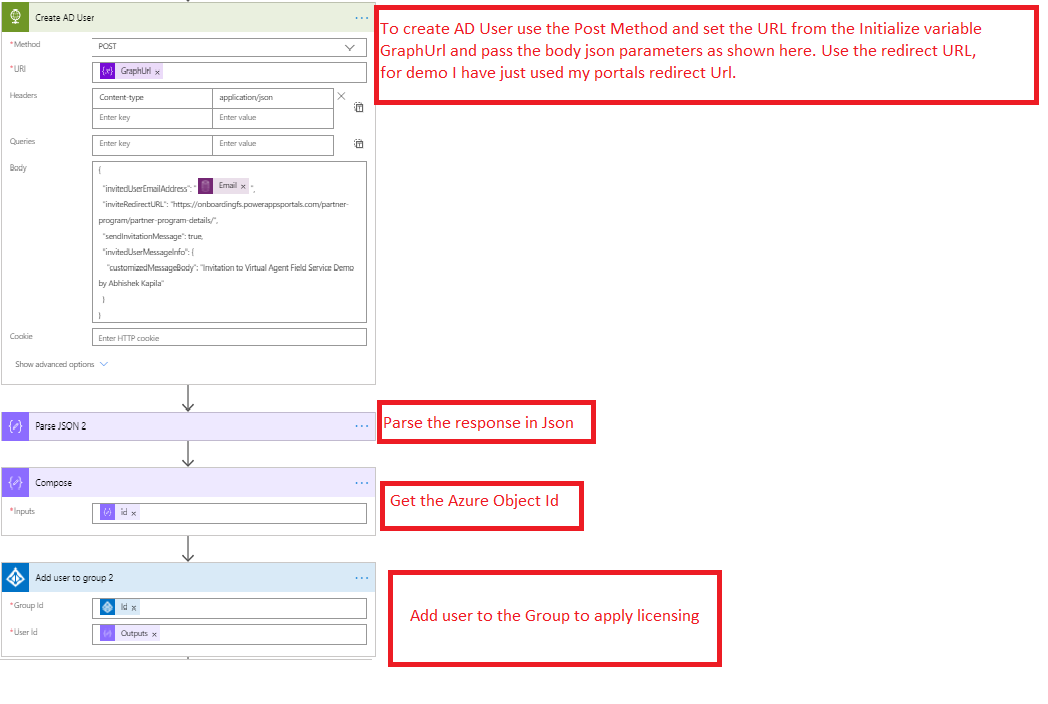
The above items are achieved with the following PowerAutomate
Complete Flow Explain

Get AD User

Add User to Group

Create AD User
The process of authentication is the same as shown in “Get AD User”
Remove User from Group
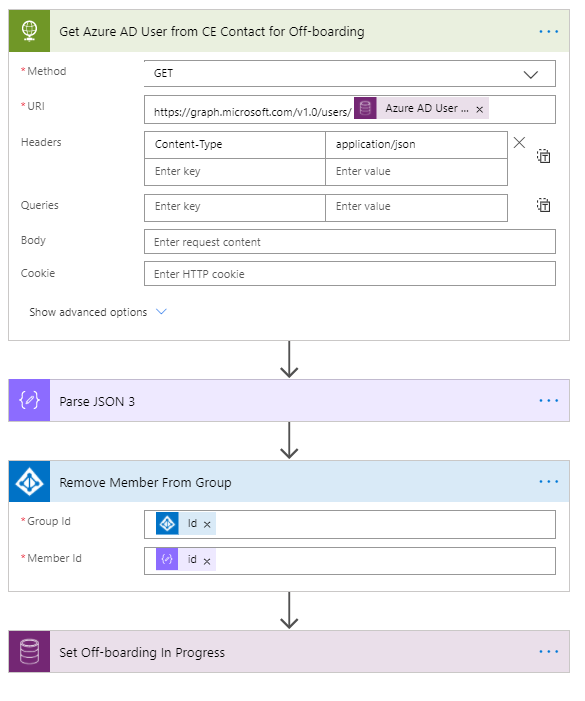
The process for authentication is the same as shown in “Get AD User”
User in CRM


Bookable Resource created in CRM

Bookable Resource created in CRM using PowerAutomate

Invitation Received by the CRM Contact/Bookable Resource


Note: I mistakenly used Redirect Url as the Portal Url, which may work in a situation where you don't want Field Service users to get into CRM but instead see a thank you custom page and begin the field job.

Add Security Role to the User
Two ways of doing it:
1. Add Security role to the User during the time of licensing using PowerAutomate, as shown below

2. Create a team in CRM of type AAD Security Group and specify the AD Group ID form Azure. Once the User logs into CRM it will automatically assign the Security Role associated to this team to the User. Screenshot of Teams created in CE is shown below


Let's book this resource now


Let's see if Resource Master, tries to set Affirm Resource to Not Allowed, then what happens from the portal.

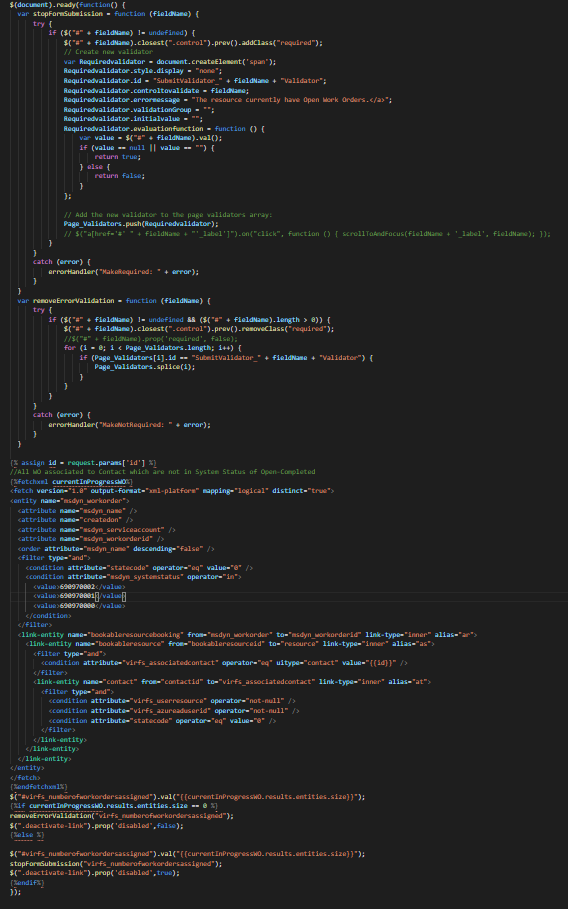
I have used simple JQuery and Liquid Code to stop the Off-boarding resource if there is any Open WO associated with it.
Let's Complete WO in CRM now,

Now the Contact can be Off-boarded.
Let's set Affirm Resource to Not Allowed now, this will trigger the flow to remove User from Azure AD Group and thus revoke the licensing and will deactivate the bookable resource. in CRM.
Comments
Post a Comment